(Deprecated) Data Management Tool
This tool is used for migrating GT Workcenter eForms created in one database to another database smoothly and easily.
Source Database Steps
Navigation: Manage GT eForms 3.x > GT Technical Setup > Data Management
Data Migration Tab
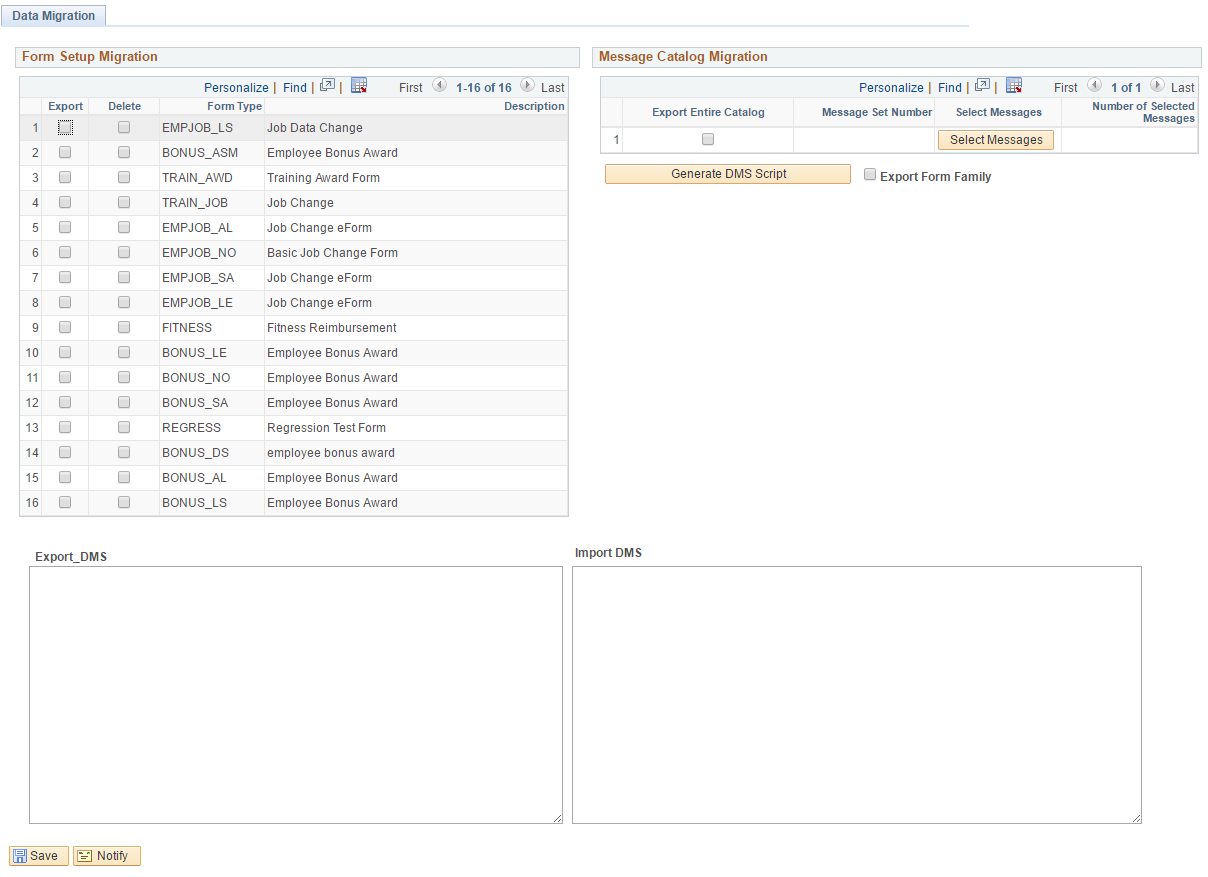
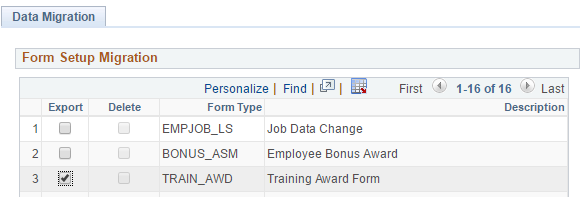
Form Setup Migration Section
This grid contains a list of all of the forms that have been created in the source environment.
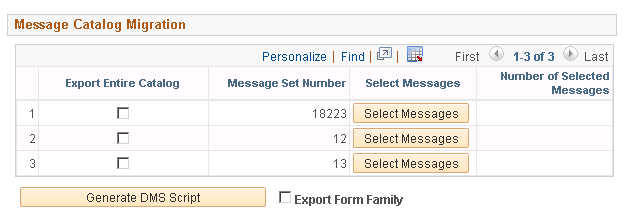
Message Catalog Migration Section
This grid contains a list of the message catalogs used by the forms listed in the Form Setup Migration grid. The list of message catalogs is generated dynamically based on the currently selected forms.
It should be noted that you CANNOT generate a DMS script that both exports forms AND deletes others at the same time. If you select a form for export, every row’s delete check box will deactivate. Likewise, if you select a form for delete, all of the export check boxes will deactivate, too.
Steps to Select Forms and Associated Message Catalogs to Be Exported
Steps:
- Select the forms that need to be migrated to the target database.
- Once a form type is selected for export, the Message Catalog Migration grid will populate with the message catalogs used by form(s).
-
If this is the first form of its form family that you are migrating, you’ll need to check the Export Form Family checkbox before proceeding with generating the DMS scripts.
-
At this point, you have a few choices as to how you want to generate the DMS scripts:
-
If there is no need to migrate the corresponding message catalogs and/or messages, you can click the Generate DMS Script button and the Export and Import DMS scripts will be generated. (Skip to step 5 for further instruction).
-
If you need to migrate an entire message catalog, you can simply check the Export Entire Catalog check box for the necessary rows. Once you’ve selected the catalogs that need to be migrated, click Generate DMS Script. (Skip to step 5 for further instruction).
-
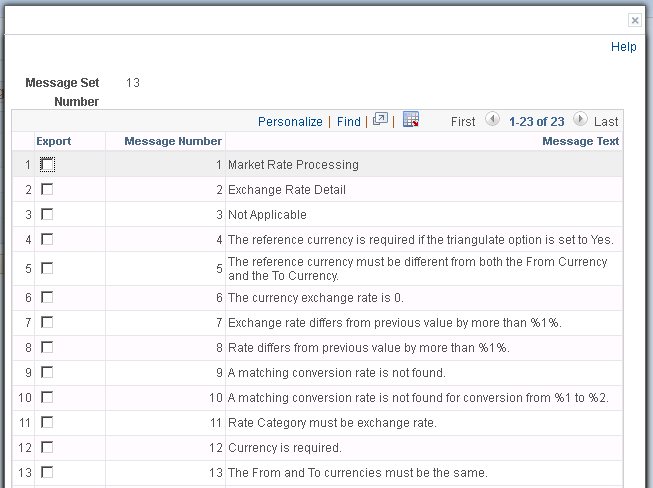
If you need to migrate only select messages from the referenced message catalogs, you can click the Select Messages button on the corresponding row to select the individual messages that are specifically needed.
-
You will see a page that looks like the following:
-
Simply check the Export check box for each of the messages that need to be migrated and click OK. (Skip to step 5 for further instruction).
-
-
You can also select certain entire catalogs for migration, and then only select certain messages for a given catalog depending on your needs.
-
-
Once you’ve clicked Generate DMS Script, the export and import DMS scripts will populate into the Export DMS and Import DMS scripts located at the bottom of the page:
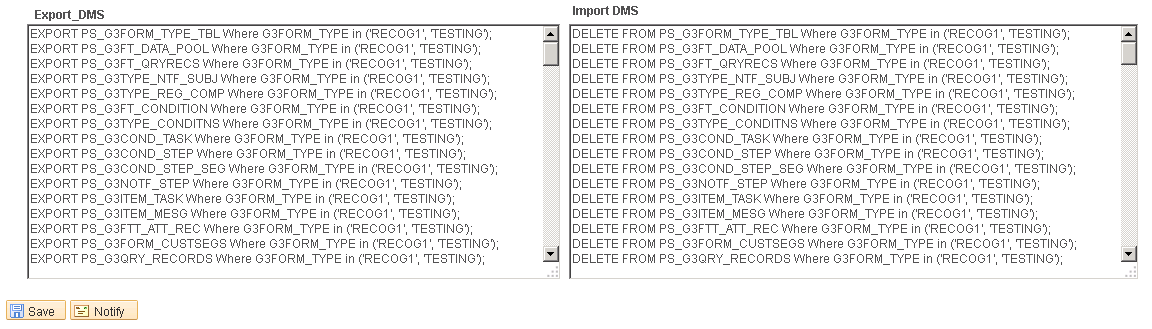
- Note – The Data Management Tool does not generate the SET LOG and SET INPUT/OUTPUT lines. Those will need to be added manually to Data Mover.