General Tab
The Form Type Table is the key setup table in the GT eForms framework. Generally, each existing paper form would equal a form type. For example, if doing personnel action forms one form type would be Hire, another might be Additional Pay Request and a third could be Termination.
However, some designs may combine various paper forms into one form type through planned use of conditions, visual ifs, and other tools within the framework. The form type is generally decided during (or because of) a Discovery period.
Each form type defines the fields, pages, and approval routing that is required. As a new form type is created, the main pages are set up as the default. After the main pages are set, other conditions can be set and indicated as differing information from the default.
Navigation: Manage GT eForms 3.x > Form Setup
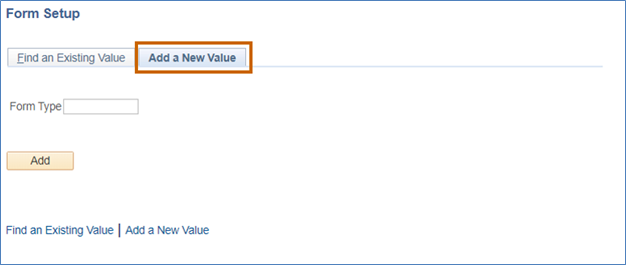
The initial search page has two options: Find an Existing Value or Add a New Value. Below details the Add a New Value option.
| Field | Value/use |
|---|---|
| Form Type | Form Type Enter a unique value that will be used to identify this form. 10 characters or less. |
| Add | Use button to proceed to the next page |
Find an Existing Form
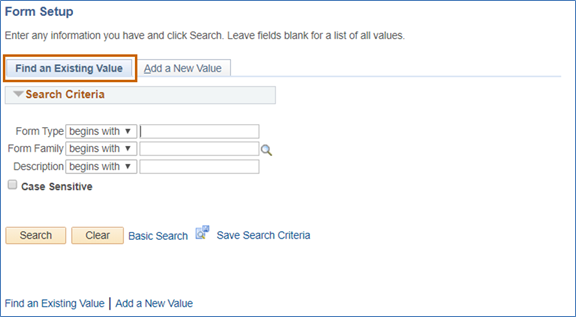
The initial search page has two options: Find an Existing Value or Add a New Value. Below details the Find an Existing Value option. See above for details on adding a new value.
| Field | Value/Use |
|---|---|
| Form Type | Limit search results by Form Type ID |
| Form Family | Limit search results by Form Family |
| Description | Limit search results by form description |
| Case Sensitive (checkbox) | Check this box to have searches be case sensitive |
| Search | Button generates results based on above search criteria |
| Clear | Clear search criteria |
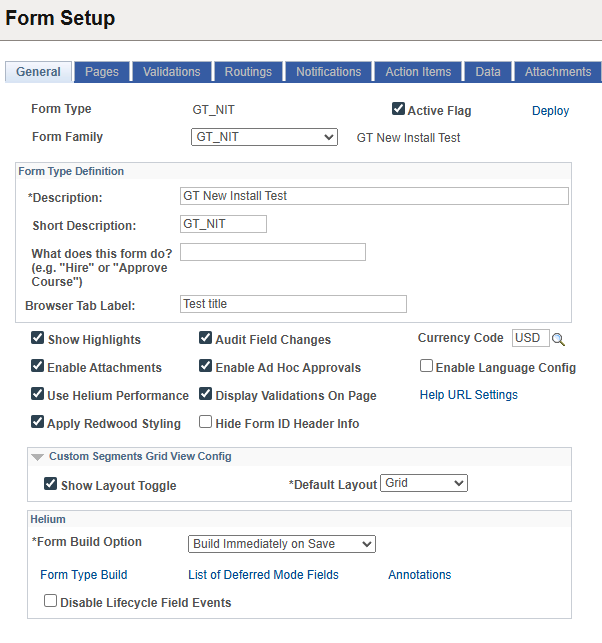
General Tab - Settings
The General tab contains basic settings to configure the form.
| Field | Value/Use |
|---|---|
| Form Type | Displays the form type ID set during the add process, does not allow edits |
| Active Flag | Click the check box for this form to be available for end users in their menu |
| Deploy Tool | Launches the deploy tool in a new window that can be used to generate this form type to a Homepage or WorkCenter |
| Form Family | Group the form type into the appropriate family. See "Creating a Form Family" document for more information |
Form Type Definition
| Field | Value/Use |
|---|---|
| Description | Enter in a description – max field length 30, alphanumeric |
| Short Description | Enter a short description – max field length 10, alphanumeric |
| What does this form do? | Enter a description of what the form will be used for |
| Show Highlights | When checked, changes made to the form will highlight |
| Audit Field Changes | When checked, field changes in Evaluate and Update tasks are tracked and a comment is appended to the comment segment for every field change |
| Currency Code | Use the prompt lookup to select the default currency type for the form type |
| Enable Attachments | When checked, the attachment segment will show on the page immediately prior to Finalized or History pages |
| Enable Ad Hoc Approvals | When checked, enables Ad Hoc Routing |
| Enable Language Config | When checked, will display languages buttons on subsequent tabs so form can be translated into different languages |
| Use Helium Performance | When checked, will apply performance upgrades first released in our Helium service pack |
| Display Validation On Page (Beta) | When unchecked, validation messages appear in a pop-up box. When checked, fields/segments are highlighted in red and the validation messages shows next to the field or segment they pertain to, as well as in a “Validation Messages” section that scrolls with the page and can be collapsed. Note: Even when checked, Peoplesoft formatting validations will still appear as pop-up boxes. For example, if you enter an invalid value in a prompt or a date that is not valid, a pop-up message will display. See the 'Validations Tab' document for more information. |
| Help URL Settings | When clicked, opens options to create a customized link that will appear on form. See the Help URL Settings section below for additional details. |
| Apply Redwood Styling | When checked, enables Redwood styling for this form. A style sheet must be active for this setting to have an effect. See the 'Form Type Styles' document for more information. |
| Hide Form ID Header Info | When checked, hides the Form ID header information (Form ID and status) to form users on all pages and tasks. |
Custom Segments Grid View Config
| Field | Value/Use |
|---|---|
| Show Layout Toggle | Enables the toggle to swap between List and Grid views for custom segments |
| Default Layout | Determines if List or Grid will be the default view when the toggle is enabled |
Helium
| Field | Value/Use |
|---|---|
| Form Build Option | Dropdown to control if form build is run on save, via a process scheduler, or manually. See below for details on each option |
| Form Type Build | This link will open the Form Type Build page in a new window and provide an option to do a Basic or Advanced form build. Reference the Form Type Build document for more information. |
| List of Deferred Mode Fields | This link will open in a new window and show all form fields. You should use this link to view the setup table that lists all the fields on a form and allows you to quickly make changes to each field’s Deferred Mode. Reference the Deferred Mode document for more information. |
| Annotations | This link will open in a new window and show the Annotations field. Use this link to view the PeopleCode parts and events in a Form Type and whether those parts/events have been annotated. Reference the Annotations document for more information. |
| Disable Lifecycle Field Events | In 3.50 Standard, lifecycled fields do not fire FieldChange and FieldEdit. Lifecycle refers to “Update when this source Changes”. In 3.50 Helium, lifecycled fields do fire FieldChange and FieldEdit events. If you want to revert to the Standard behavior, then check this box. |
| Run Form Build / Build Detail (Link) | 1. Form Build Option set to “Build Immediately on Save” – No link will appear. 2. Form Build Option set to “Save Without Building” – The link “Run Form Build” will appear and when selected will open the Form Type Build component in a modal window. 3. Form Build Option set to “Schedule Build on Save” – The link “Build Detail” will appear and when selected will open the Form Type Build component in a modal window. Note: Review the 'Form Type Build' feature document for more information. |
Form Type Build Options
Build Immediately on Save
The default for new forms will be “Build Immediately on Save.” This option means that every time the Form Type Setup is saved, a Form Build will start and finish before indicating the Form Setup has been saved. The status of the Form Build will appear in a message box after it is completed, indicating if the build was successful or failed due to errors. If the build was successful, no further action is needed, and you can test your form and see your new form behavior. If your build failed, you can click a link on the General tab to open the Form Type Build page in a new tab to review both error and warning messages.
Save Without Building
If you do not want to wait for your form to finishing building in your user session but still would like the Form Build Process to run each time you save, you can change the Form Build Option to “Schedule Build on Save.” When this option is selected, saving Form Setup will kick off the build via the Process Scheduler. A “Build Details” link will appear above the save button for a form builder to view the status of the build in the process monitor. Again, the process monitor will either show successful or error and the same process mentioned previously to review warnings and errors can be followed.
Schedule Build on Save
If you are in the initial stages of configuring your form and do not wish to kick off the form build each time you save, you can change the Form Build Option to “Save Without Building”. This means the build process will never automatically kick off. When this option is selected, a “Run Form Build” link will appear above the Save button on Form Setup to remind you to kick off the build when you are ready. Clicking that link will open the Form Type Build setup page in a modal window where you can choose to run the form build process in your user session or via the Process Scheduler. Again, the same messages and process to review warnings and errors apply. If you forget to run the Form Build and go to test your form, you may encounter errors when opening or the form may not behave as expected. Therefore, it is best to only choose this option when you run into issues with the form build kicking off too frequently or taking up time when rapidly developing.
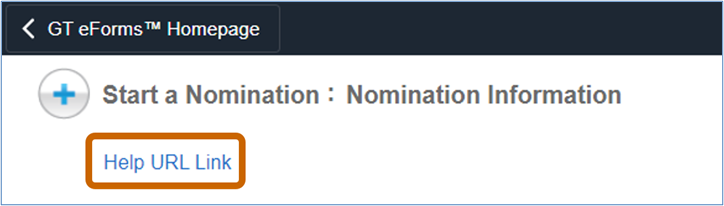
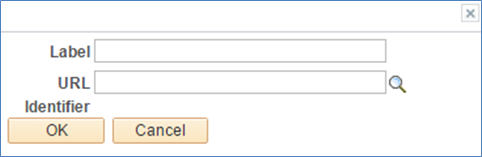
Help URL Settings
The Help URL Settings link was created to allow you to link to more thorough documentation, an email address, etc. You can configure the link by following the process below after selecting “Help URL Settings” as shown in the image above. Once you select “Help URL Settings” the following window will appear.
| Field | Value/Use |
|---|---|
| Label | Enter link text to be displayed on form as shown below |
| URL Identifier | Use lookup to select URL that will open in a new window when the link is selected. Note: To set up a URL, you must create it by going to the following navigation: Main Menu > PeopleTools > Utilities > Administration > URLs |
A developer can also completely change the display of the help section. For example, it could be changed to a text link, an image that links, or anything using HTML.