Form Admin Tool
The Form Admin Tool is used by a form administrator to manage workflow routing and CI for a single form transaction, as well as to quickly access form data.
Navigation: Manage GT eForms 3.x > Form Admin Tool
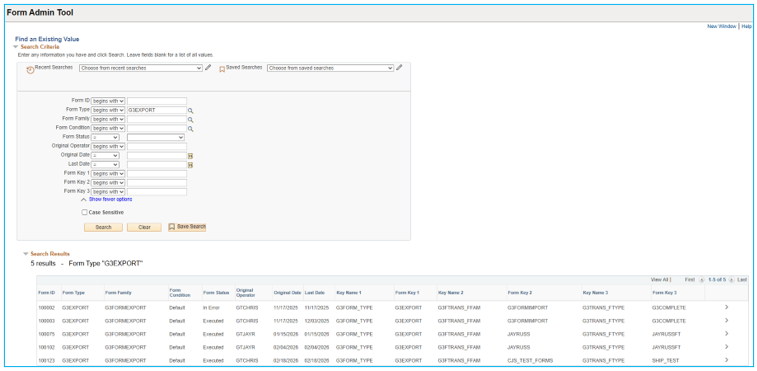
Search For eForms
To access the Form Admin Tool, form administrators can search for an eForm using the parameters below. Click on a link in the results list to access the Form Admin Tool for that eForm.
| SEARCH FIELD | SEARCH FIELD DESCRIPTION |
|---|---|
| Form ID | Number assigned to an initiated form |
| Form Type | Unique identifier provided on the Form Setup table |
| Form Family | Form Family used for the Form Type |
| Form Condition | Either the default form condition or another form condition configured on Form Setup |
| Form Status | Status of the form based on its progress through a workflow (Authorized, Denied, Executed, In Error, Saved, Pending, Withdrawn) |
| Original Operator | USERID of the Form Creator. |
| Originated Date | The date a form was submitted. If looking for forms submitted in a date range, use the “between” option in the operator dropdown list. |
| Last Date | The date a form was last updated. If looking for forms updated in a date range, use the “between” option in the operator dropdown list. |
| Form Key 1* | Form Key data in Key Number 1, from the Form Key Data located in the Form List tab. |
| Form Key 2* | Form Key data in Key Number 2, from the Form Key Data located in the Form List tab. |
| Form Key 3* | Form Key data in Key Number 3, from the Form Key Data located in the Form List tab. |
| Recent Searches | Choose the dropdown arrow to select a recent search. Click the pencil icon to 'Manage Recent Searches'. You can delete individual searches by clicking the 'X' on the row, or you can delete all recent searches by clicking the 'Delete All' link. Click the 'Save' button to save your changes or the 'Cancel' button to return to the search page without saving changes. |
| Saved Searches | Choose the dropdown arrow to select a saved search. Click the pencil icon to 'Manage Saved Searches'. You can display the saved searches in a different order by selecting the 'Display By' dropdown. The options are 'Newest on top', 'Alphabetical', or 'Oldest on top'. Click the 'Rename' link to rename the saved search. You can delete individual searches by clicking the 'X' on the row. You can delete all saved searches by clicking the 'Delete All' link. Click the 'Save' button to save your changes or the 'Cancel' button to return to the search page without saving changes. |
| Show more options / Show fewer options (link) | The search will default to 'begins with', but the operator can be changed. Click the 'Show fewer options' link to search using 'begins with' on a single field. |
| Case Sensititve | The Case Sensitive checkbox allows you the option to make the search case-sensitive. |
| Search (button) | Click the 'Search' button to search for existing eForm |
| Clear (button) | Click the 'Clear' button to remove the text in the search fields |
| Save Search (button) | Once you enter text into a search field and click the 'Search' button, the 'Save Search' button will appear. Click the 'Save Search' button and enter a 'Name' for the search. Click the 'Save' button to save your changes or the 'Cancel' button to return to the search page without saving changes. |
Once you select a form, you can change the form key order on the Form List tab in the Form Key Data section.
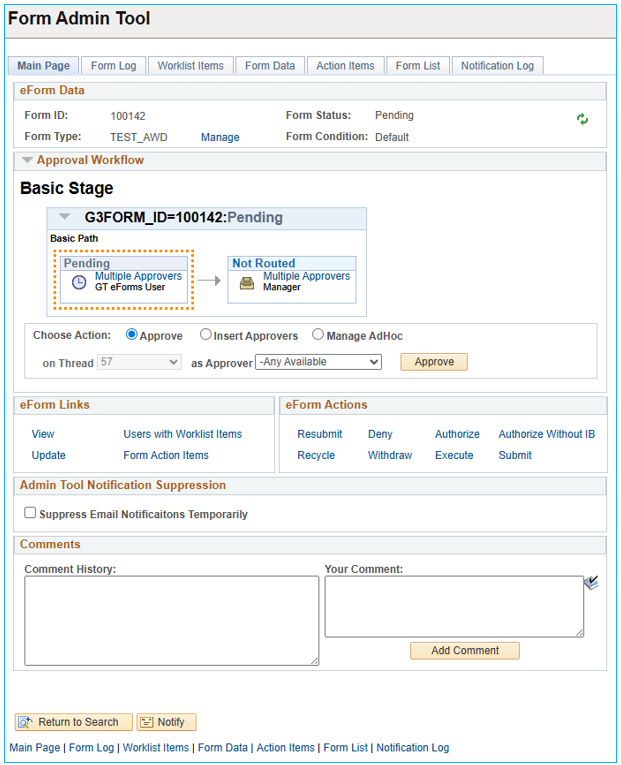
Main Page
Use the Main Page tab to view selected eForm Data, view an eForm AWE Workflow path, add AdHoc approvers to the path, add approvers to the current step, access eForm Links, access eForm Actions, view and add eForm Comments.
Standard Form Transaction Alert
The screenshot below shows an example of the type of alert users will see when they open a Standard form transaction in the Form Admin Tool and the Form Type is using Helium Performance. They will have an option to convert the individual form transaction to Helium from within the Admin Tool via a Convert Form ID button.
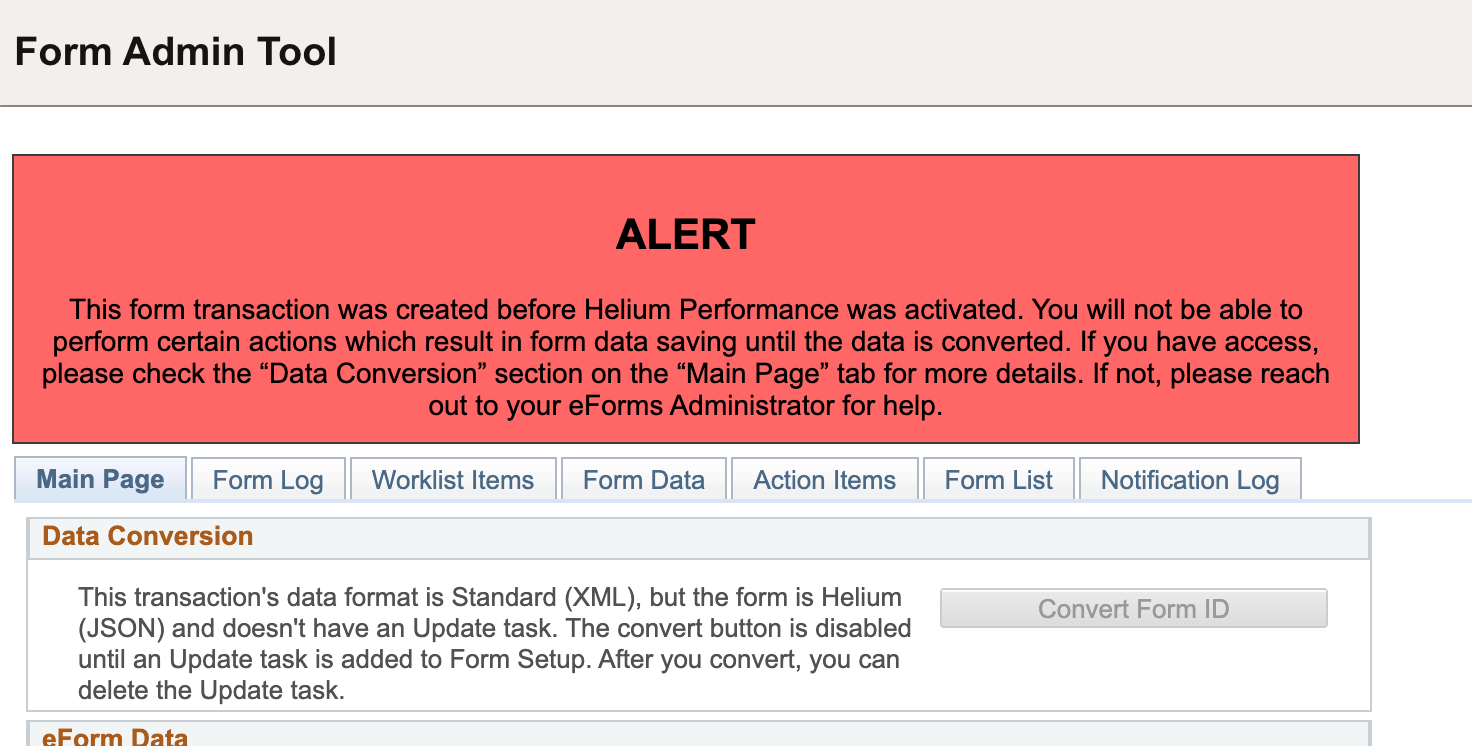
To convert all Standard transactions for a form type after activating Helium Performance for the Form Type, we recommend using the Standard Form Data Converter. Please refer to the documentation for more information.
eForm Data
This group box displays certain key eForm data to verify the form administrator is accessing the expected form.

| FIELD | Functionality |
|---|---|
| Form ID | Form ID of the form selected in read-only view |
| Form Type | Form Type of the form selected in read-only view |
| Manage (link) | Opens the Form Setup page used to manage the setup for the Form Type. This link will only show if the user has access to the Form Setup component. |
| Form Status | The current status of the form selected |
| Form Condition | Form Condition of the form selected in read-only view |
| Reload Form | Refreshes the data on the page |
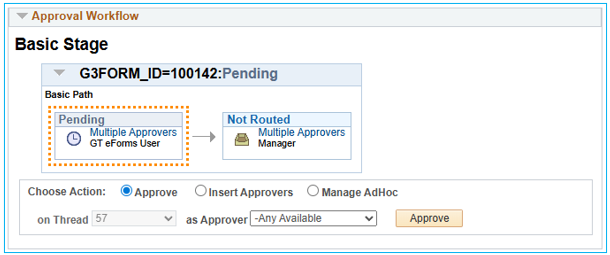
Approval Workflow
This group box displays key eForm data for the workflow of the form when the form uses routing. Through the “Choose Action” box the form administrator can approve the form as a user set to the current approval stage (Approve), insert an approver into the current stage (Insert Approvers), or add AdHocs appovers (Manage AdHoc). For all three actions, there is a hyperlink in each step with an Approver Name or “Multiple Approvers” when there is more than one approver in a step. The hyperlink pens the list of Approvers for the step (including approvers included in rosters) and displays general/contact information for each user.
Approve Action
Choose Action - Approve allows the admin to approve the form at its current step as an approver in the workflow for that step. The admin can select the user from the list in “As Approver.”
| PAGE OBJECT | FUNCTIONALITY |
|---|---|
| on Thread | Can be used to Approve a specific approval thread workflows that have Line Level approvals |
| “as Approver” (dropdown) | Provides a list of users that the admin can approve as. Note: When an admin approves as another user, the workflow shows approved by the user selected and the Form Log will show “GTAdmin:[OPRID]:” at the beginning of the step title, and will record the admin’s user ID |
| Approve (button) | Approves the current step in the workflow |
Insert Approvers Action
Choose Action - Insert Approvers allows the admin to insert an additional approver or reviewer at the current step in the workflow.
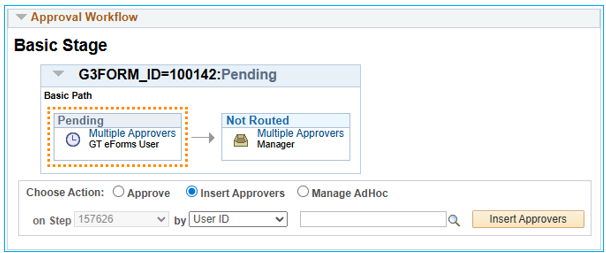
| PAGE OBJECT | FUNCTIONALITY |
|---|---|
| on Step | Can be used to add Approvers to specific steps on workflows where multiple steps are pending at the same time. |
| by (dropdown) | Dropdown includes options: User ID: Used to add a new User ID as an approver to an existing step in the workflow. Roster Group: Used to add a new roster group as approvers to an existing step in the workflow. |
| Look up (icon) Only shows when User ID is selected in 'by' dropdown | Search is used to find the User ID you want to add as an approver |
| Roster (icon) Only shows when Roster Group is selected in 'by' dropdown | Used to select a new roster to add as an approver |
| Insert Approvers (button) | Saves new approver(s) to the workflow |
Manage AdHoc Action
Choose Action - Manage AdHoc allows the admin to add approvers to the workflow at any point, request information, and start a new path. Click “Save AdHoc Changes” to save the changes, or “Discard Changes” to delete the changes.
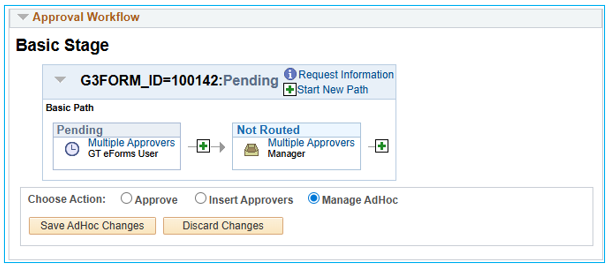
| PAGE OBJECT | FUNCTIONALITY |
|---|---|
| Request Information (link) | Puts current approver on hold and sends approver a notification |
| Start New Path (link) | Starts a new Approval Path. Click the link and a window will open, prompting the user to enter a User Id to be assigned to the new approval path. The approval path will start in “Not Routed” status. Choose approver to authorize the user to take action on the form. (approve, deny, etc.) Choose reviewer to notify the user, but the user cannot take action to affect the workflow. Click the 'Insert' button to load the change or 'Cancel' button to return without saving the change. |
| Plus (icon) | Creates an additional step in the workflow. Use the search to find the User ID you want to add as an approver. |
| Save AdHoc Changes (button) | Saves AdHoc changes |
| Discard Changes (button) | Removes AdHoc changes |
For any workflows using G3FORMLIST_XRF (GT Basic Workflows), there is a view called G3AWE_FRM_USTEP that can be queried using a Process query type to see the approval history for eForms. The view allows you to see which users approved, didn’t approve, were skipped, and were admin approved. The view also includes the User IDs, timestamps, and any terminated workflow history when the form has been resubmitted. You must use the Process query type when querying the new view.
eForm Links
The target pages for the links below may trigger pop-up blockers. Enable pop-ups for this URL in order to use this feature.
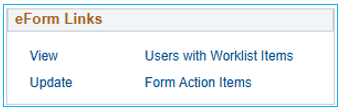
| PAGE OBJECT | FUNCTIONALITY |
|---|---|
| View | Opens the eForm in the View Task |
| Update | Opens the eForm in the Update Task |
| Users with Worklist Items | Opens the Worklist Items tab |
| Form Action Items | Opens the Action Items tab |
eForm Actions
eForm Actions allow an administrator to update the status of an eForm, regardless of its current status or progress through the workflow. The eForm Actions displayed may adjust as the Admin user clicks different actions.

| PAGE OBJECT | FUNCTIONALITY |
|---|---|
| Resubmit | Restarts the workflow from the beginning of the approval process, reinstating original assignees. Any ad hoc or alternate approvers are removed. |
| Recycle | Stops all AWE routing and sends the form back to the initiator. This includes any configured worklist or email notifications setup for the form type. |
| Deny | Denies the form |
| Withdraw | Withdraws the form |
| Authorize | Bypasses the workflow and triggers the integration broker by setting the form status to Authorize. |
| Execute | Bypasses the workflow and marks the form as done without triggering any integration logic. |
| Authorize Without IB | Same as Authorize, but runs processes in the user’s session instead of going through the integration broker while setting the form status to Authorize. |
| Submit | Submits the form |
Admin Tool Notification Suppression
Check the 'Suppress Email Notifications Temporarily' checkbox to prevent email notifications from being sent out when changes are being made in the Form Admin Tool.

Worklist processing should NOT be affected by this flag.
Message Status
This section shows the status of the form processing the CI (Component Interface), either run via the Integration Broker or the User Session. Errors in the CI can be viewed here and the CI can be resubmitted.
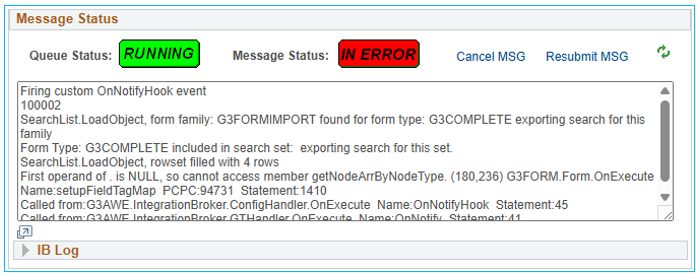
| PAGE OBJECT | FUNCTIONALITY |
|---|---|
| Queue Status | Displays the status of 'RUNNING' |
| Message Status | Displays NEW when CI is running, Done when the CI is complete without error, and IN ERROR when the CI errors. |
| Cancel MSG (link) | Click the link to stop the CI while it is running |
| Resubmit MSG (link) | Click the link to rerun the CI |
| Reload Form (icon) | Click the icon to update the Message Status while the CI is running |
| Display Log in Modal Window (icon) | Click the icon to load the log information into a modal window |
| IB Log | Click the arrow on the IB Log to display any timestamp or messaging from the IB (Integration Broker) |
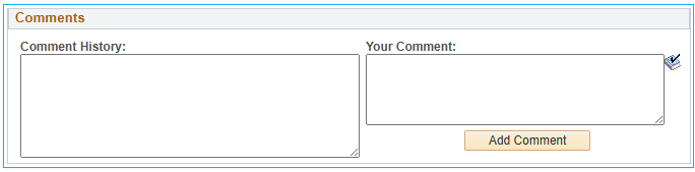
Comments
The Comments section allows an administrator to insert a comment onto an eForm.
| PAGE OBJECT | FUNCTIONALITY |
|---|---|
| Comments History | Displays all eForm comments from eForm users and administrators, in reverse chronological order |
| Your Comment text entry | Plain text entry field |
| Add Comment | Click to insert text as a comment in Comment History |
| Spell Check Your Comment (icon) | Click the icon to spellcheck the comments before you add them |
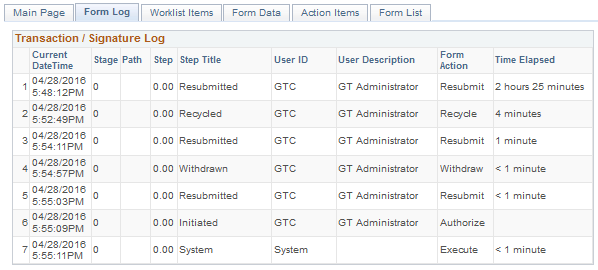
Form Log
The Form Log tab in the Form Admin Tool displays the eForm Transaction / Signature Log for review. This log captures an audit log of all actions for this form.
Worklist Items
The Worklist Items tab displays the User ID and Name of any user that currently has a worklist item associated with this form. Forms that do not generate worklist items according to the setup on the Form Setup table will not see any users in this section.

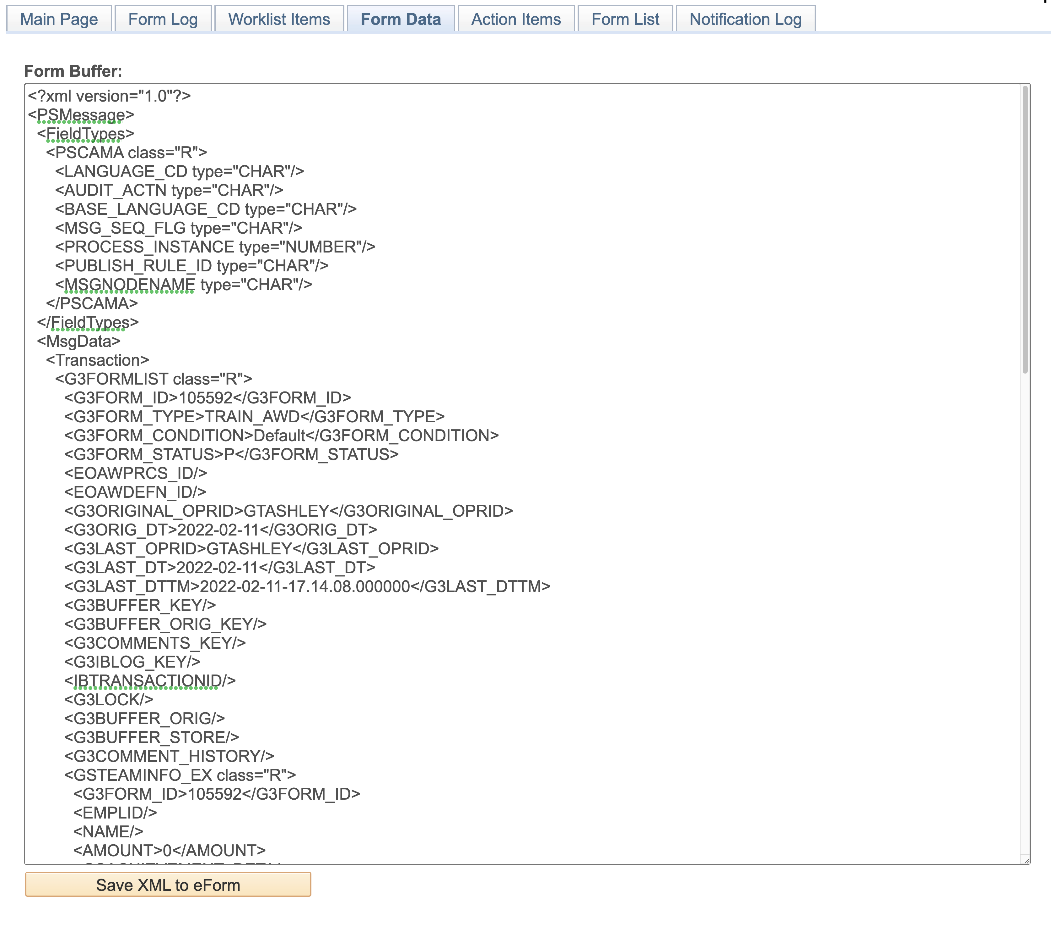
Form Data
Form data allows an administrator to see the data stored in all the fields on the form. This can help when troubleshooting form issues and errors. In addition to searching the data, those with access to this tab can change the data to directly update the form. The need to use this to update the form should be very limited. Making changes here can break the form if the XML/JSON structure is compromised. There is no audit on these changes. Contact support@gideontaylor.com if you have questions or concerns about this tab.
| Form Data tab – Standard |
|---|
 |
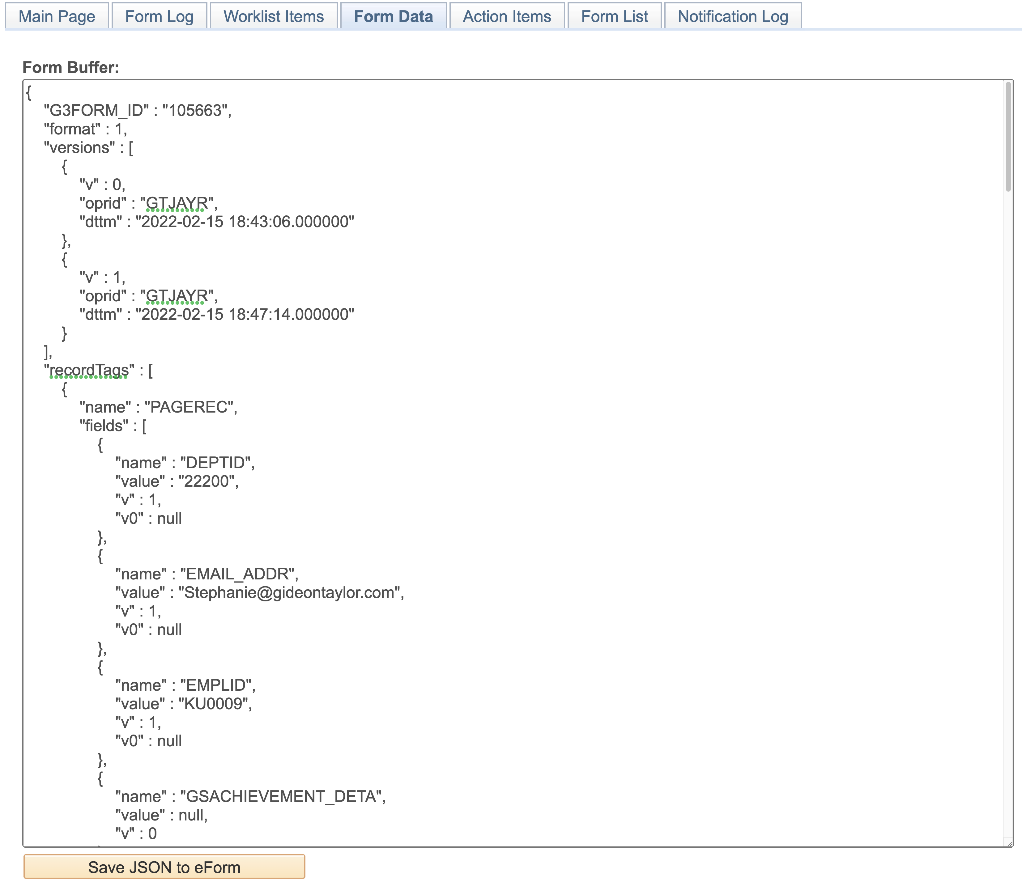
| Form Data tab - Helium |
|---|
 |
| PAGE OBJECT | FUNCTIONALITY |
|---|---|
| Form Buffer | Displays the form data and allows edits to it. The Form Buffer is blank when the Form Data tab is opened. |
| Save XML to eForm (Standard) Save JSON to eForm (Helium) | Click this button to save any edits to the form data. CAUTION: Saving a blank Form Buffer will clear all data from the current form. |
Action Items
The Action Items tab allows administrators to see any action items that users were required to acknowledge.

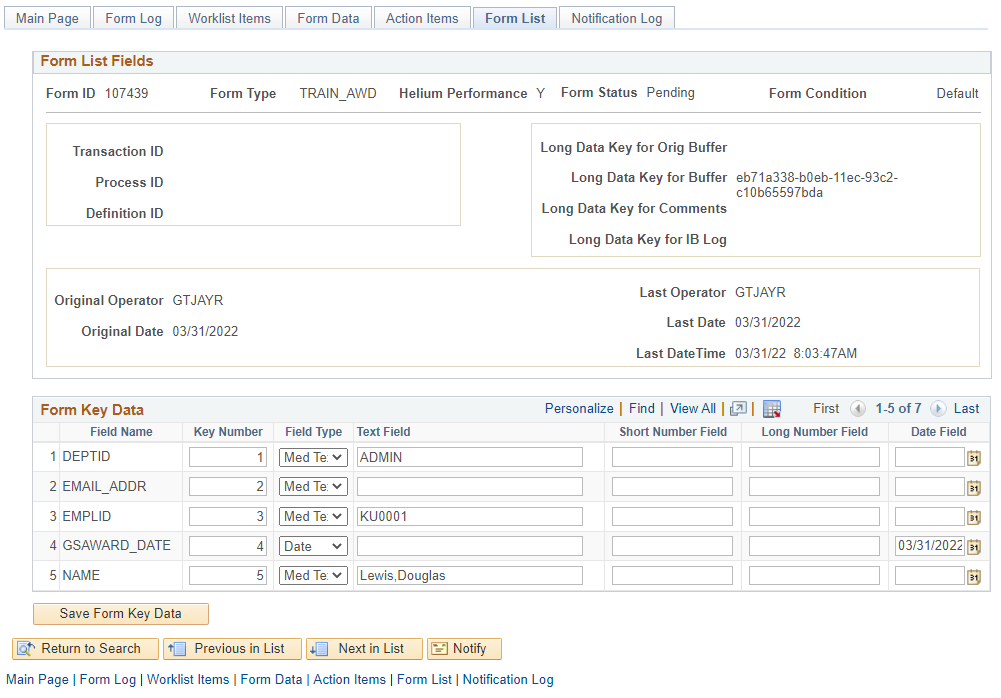
Form List
All the record fields on the G3FORMLIST for this form will be displayed here for debugging purposes. It is also a reference for administrators to see the original user and date originated, the last user along with the date/time, etc. Forms created in 3.50 Helium will have a “Y” next to “Helium Performance.” Forms created in Standard will have an “N” next to “Helium Performance.”
In the Form Key Data section, the column for Key Number is what controls the first three fields that appear on the search page. To change the key order, renumber the rows then click the Save Form Key Data button.
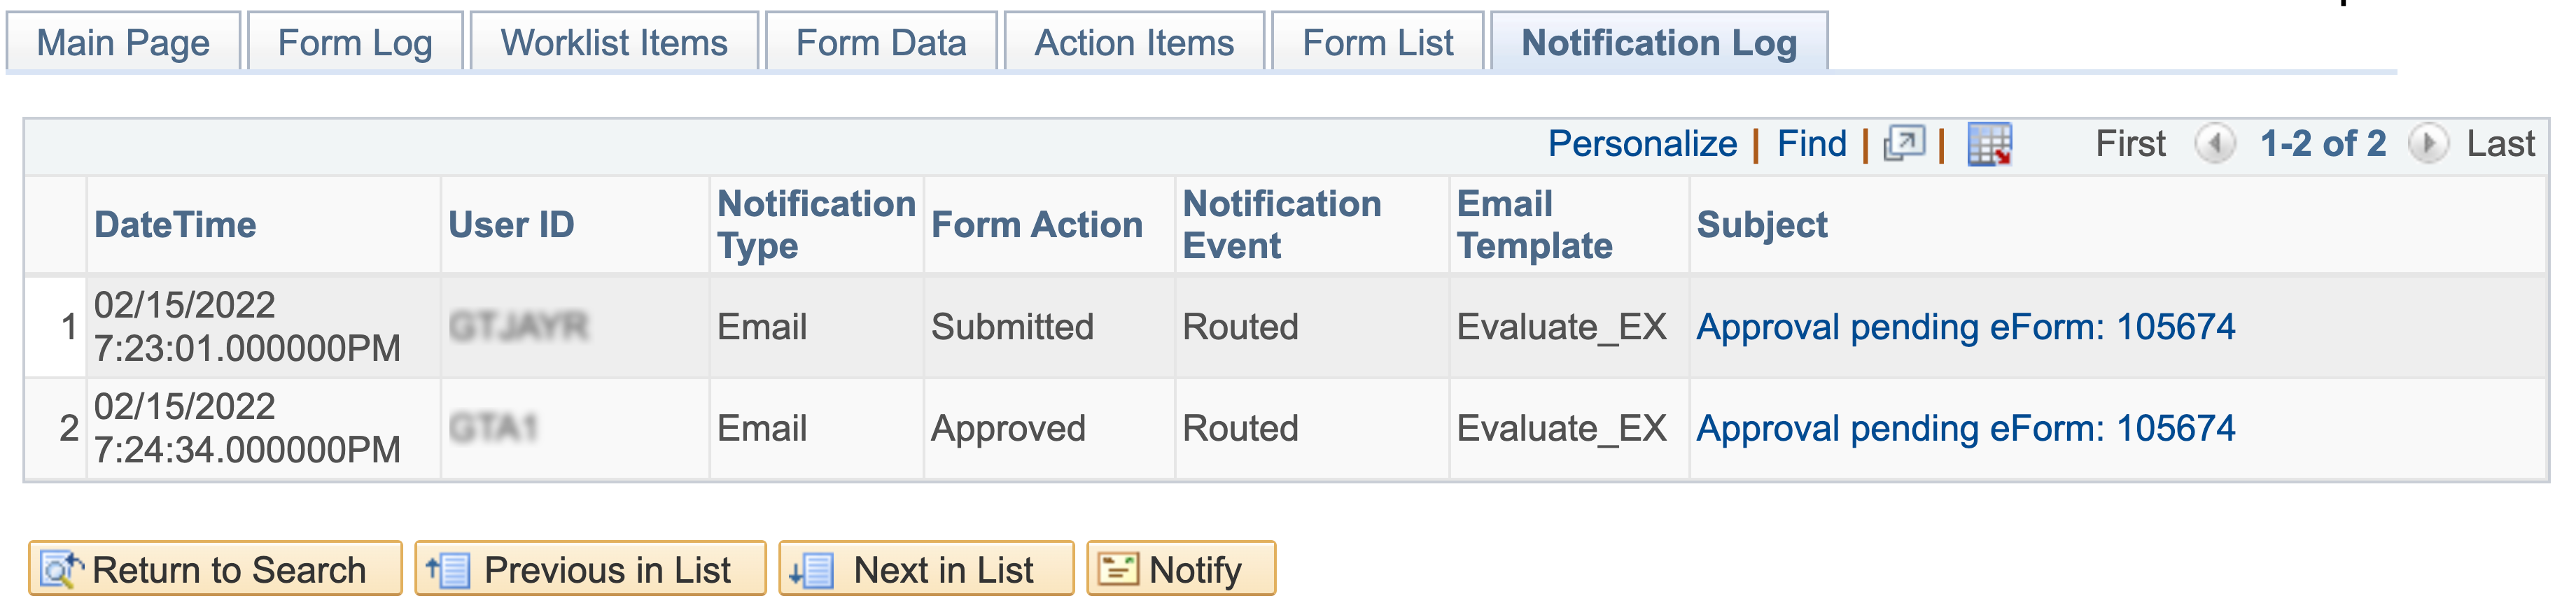
Notification Log
The Notification Log shows a list of all the notifications triggered for the selected Form ID.
If IB services are used to send emails, those notifications may not display on this log.
| PAGE OBJECT | FUNCTIONALITY |
|---|---|
| DateTime | Timestamp when the notification was sent |
| User ID | The user who triggered the email |
| Notification Type | Displays either email or worklist |
| Form Action | The form action which triggered the notification |
| Notification Event | The form event which triggered the notification. Examples include routing and message from the email tool. |
| Email Template | The email template associated with the email notification |
| Subject | Displays either the email subject or worklist subject. Click the link to view the content of the message. |
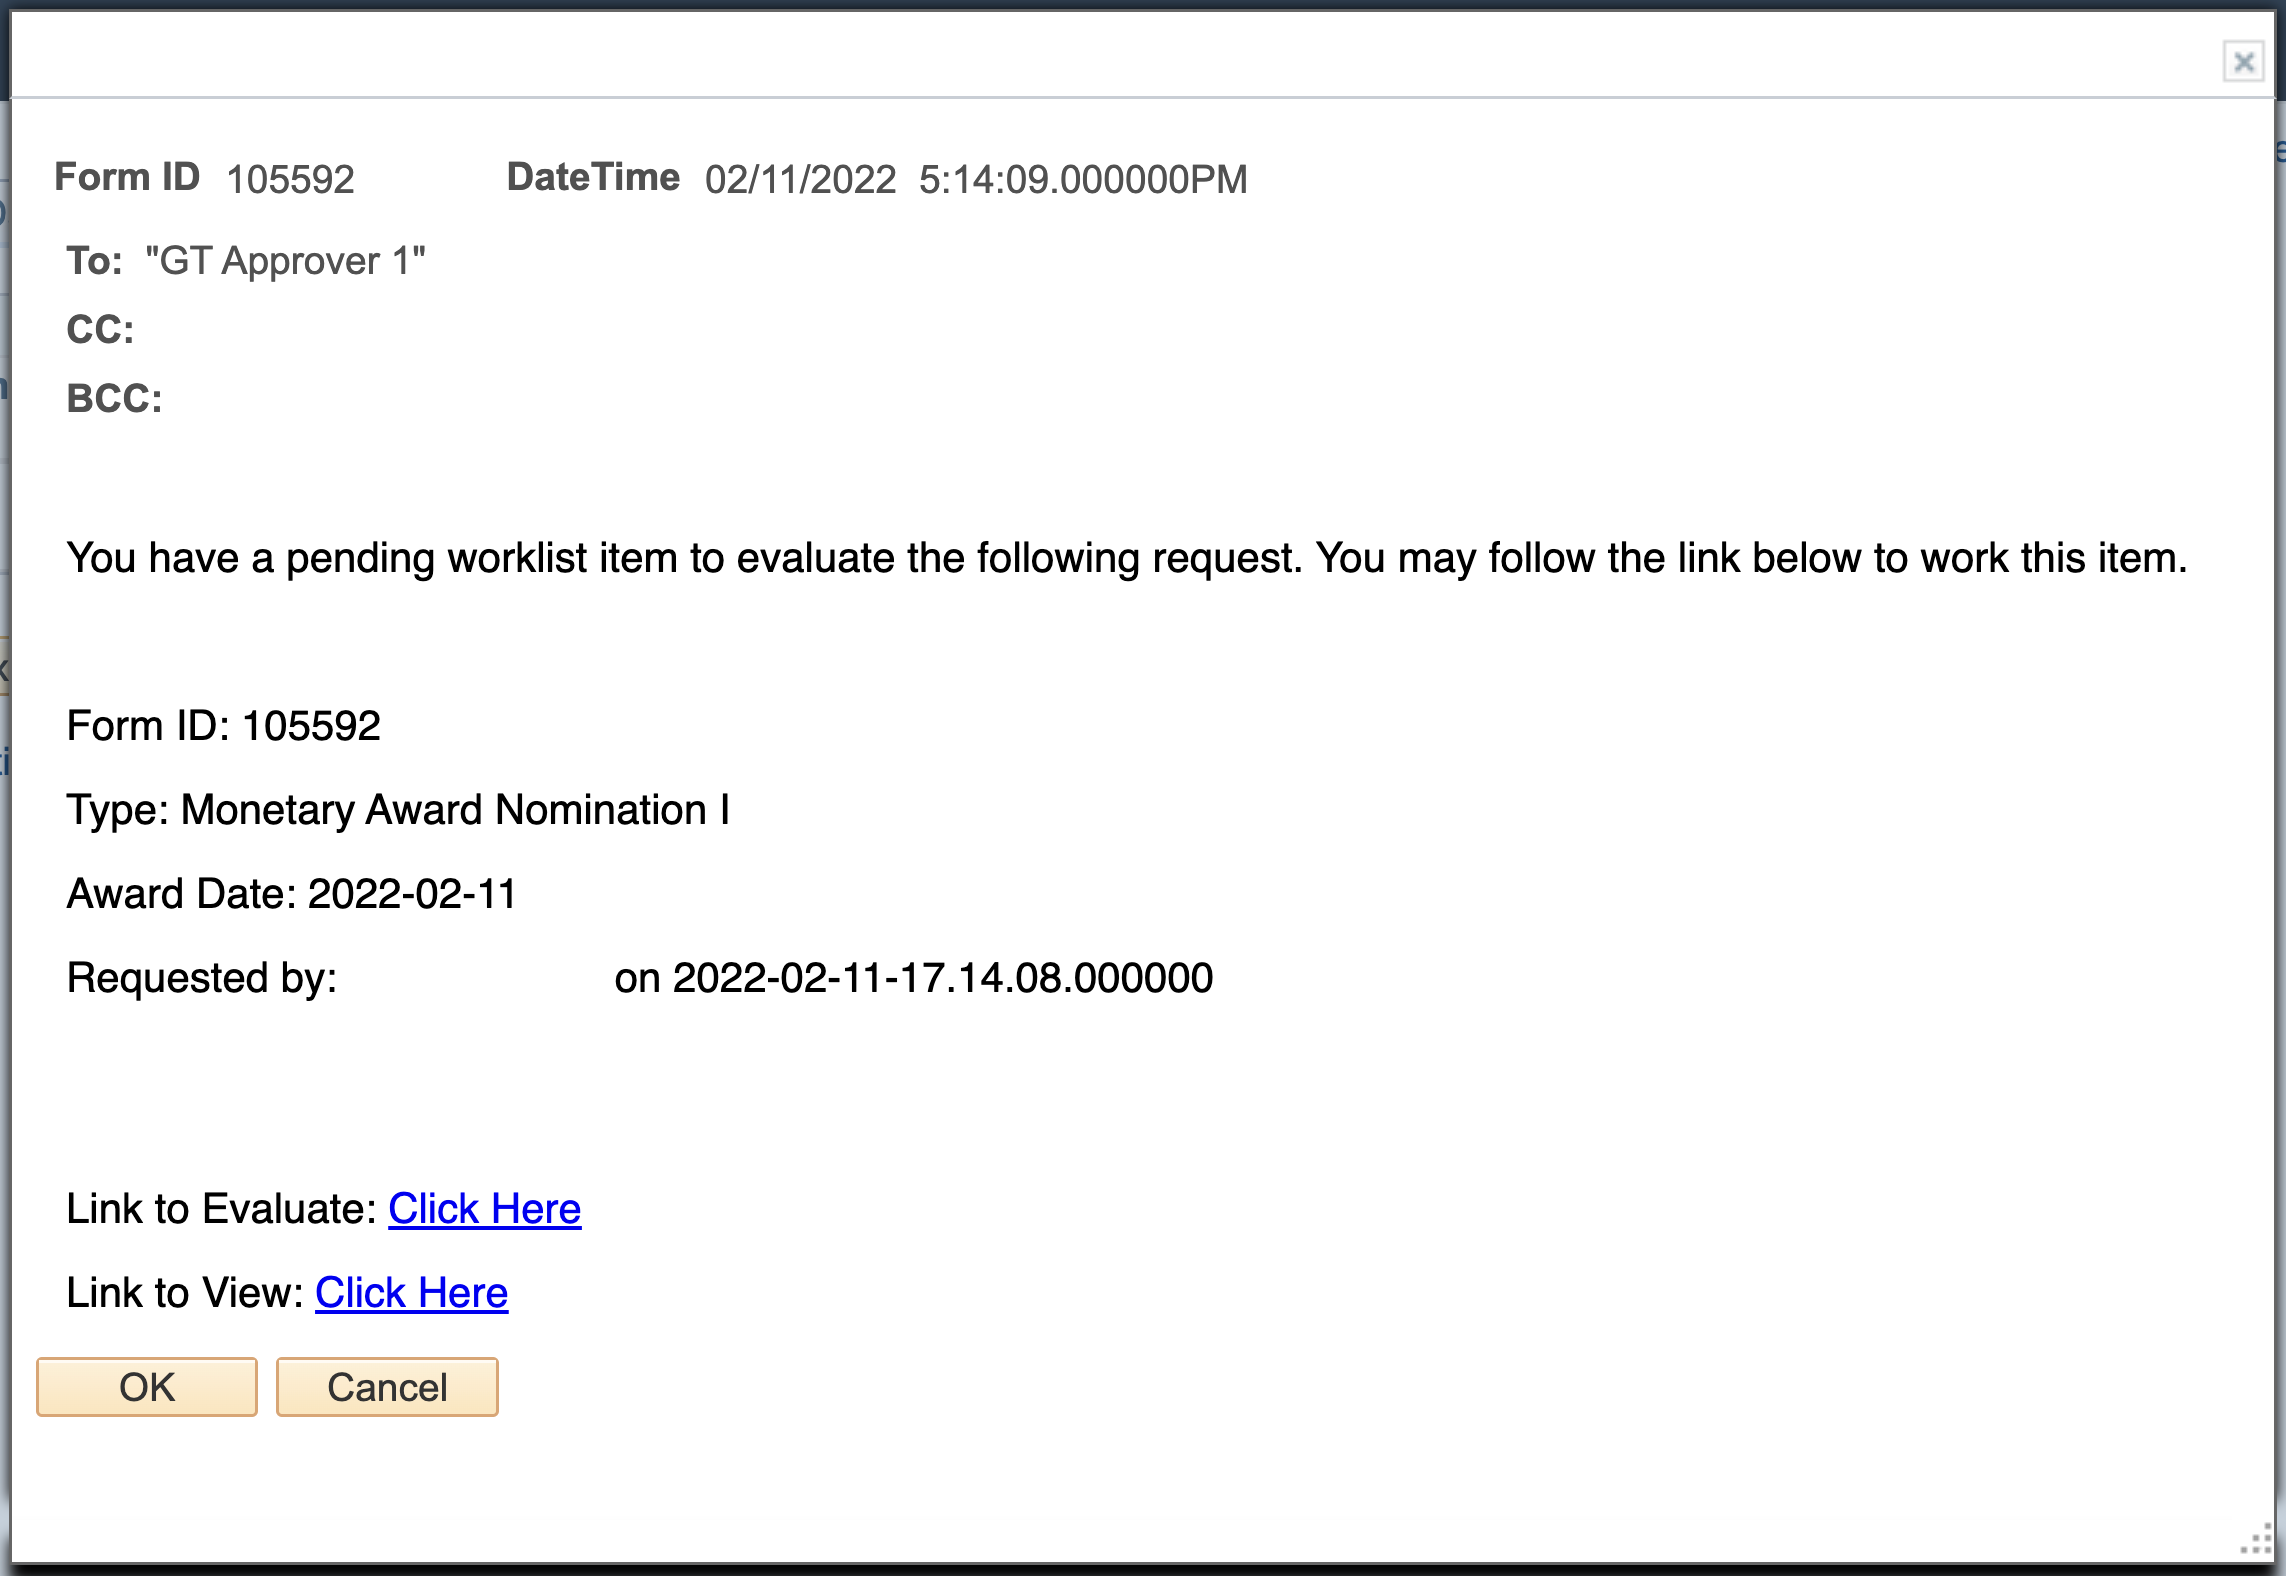
Notification Message Content
When a user clicks the hyperlink in the “Subject” column on the Notification log tab, a modal window displays the content of each notification in the log, as shown below.
| PAGE OBJECT | FUNCTIONALITY |
|---|---|
| Form ID | Form ID associated with the notification |
| DateTime | Timestamp when the notification was sent |
| Notification recipient(s) | Field will show you all the recipients that we sent the email |
| Body of window | Body of the email including any dynamic content |