eForms Assistant Setup
The eForms Assistant Setup page provides the setup needed to configure eForms Assistant for use in an environment. It is primarily intended to be a "set it and forget it" page. However, it does provide a few pieces of functionality that may be useful after the initial setup is complete. Before first using this page to set up the eForms Assistant, you must obtain your specific Client Key values from Gideon Taylor. These can be obtained by sending a request to Gideon Taylor Support.
Navigation: Main Menu > Manage GT eForms 3.x > GT Functional Setup > GT System Setup > eForms Assistant Setup
eForms Assistant Environment Setup
NOTE: To make sure this setup data does not require special consideration during environment refreshes, we recommended adding ALL Client Keys and Database Names to the lowest environment being configured. As this data is migrated up your environment stack, each key will need to be activated in the target environment only once. After the setup has made it to production, each key should have been activated and future refreshes of lower environments will automatically use the correct key based on the Database Name.
Information should be entered into the eForms Assistant Enrollment Setup grid.

| Field | Value |
|---|---|
| Enabled | This checkbox can be used to globally enable or disable the eForms Assistant chat interface everywhere in the current environment. It is only editable on the row matching the current Database Name and only after the Client Key has been activated for that row. |
| Database | The value entered here must the Database Name for the environment exactly. (This is the value returned by %DBName in PeopleCode) |
| Client Key | These values are provided to you by Gideon Taylor and are a unique identifier for each environment. You can find information on recieving your Client Keys here |
| Activate Key | This button sends a request to the eForms Assistant to activate the Client Key. Each key can only be activated once. The button is only enabled for the row where the Database Name matches the current system value, and it will be disabled once the key has been successfully activated. When entering a new key value, you will need to save the page before you can use this button. |
| Client Info | Once the client key is activated, clicking this button will send a basic info request to the eForms Assistant web service. It’s a quick way to check that your current environment is successfully communicating with the service. |
NOTE: As mentioned on the page, once a client key has been activated, it can no longer be changed. If for some reason a change needs to occur, please contact Gideon Taylor Support.
With an Ida Subscription
If your organization has upgraded to an Ida Subscription, eForms Assistant will need a bit of additional configuration to continue working as intended.

| Field | Value |
|---|---|
| We have an Ida Subscription | Turn on this checkbox if you have an Ida Subscription. |
| Version | For each environment that you have an Ida IUC configured, you should change this value from Assistant Only to Ida. For those enviroments where you don't have an Ida IUC, leave the value as Assistant Only. This will allow eForms Assistant to contiune to funciton in all of your environments. |
| Ida Server Name | For environments where you have an Ida IUC configured, you need to enter the name of your IUC server here. |
When configured as described, eForms Assistant content will be pushed to your Ida IUC instead of the GT eForms Assistant servers for environments where the Version value is set to Ida.
When users open an eForm that includes eForms Assistant content, Ida will prioritize that content over general knowledge responses. This ensures that users receive guidance and answers that are specific to your form type whenever applicable — while still having access to the full breadth of Ida’s knowledge.
Deploying the eForms Assistant Tile
The eForms Assistant tile can be used as a way for users to launch the assistant from any Homepage. Deploying the eForms Assistant tile is optional. Navigate to Manage GT eForms > Functional > System eForms Assistant Setup. Click on the Generate Tile button. This will place the tile in a folder name GT eForms User Tools. It is not added to a homepage by default, but once created you may add it to any Homepage where it will be useful to your end users. Note: After clicking the Deploy Button, you may need to refresh the page the first time to see the updated deployment status.
Welcome Greeting Override
The eForms Assistant welcome greeting can be overwritten with a custom message defined in this setup. If a custom welcome greeting is not defined, the Gideon Taylor provided default will be used instead.

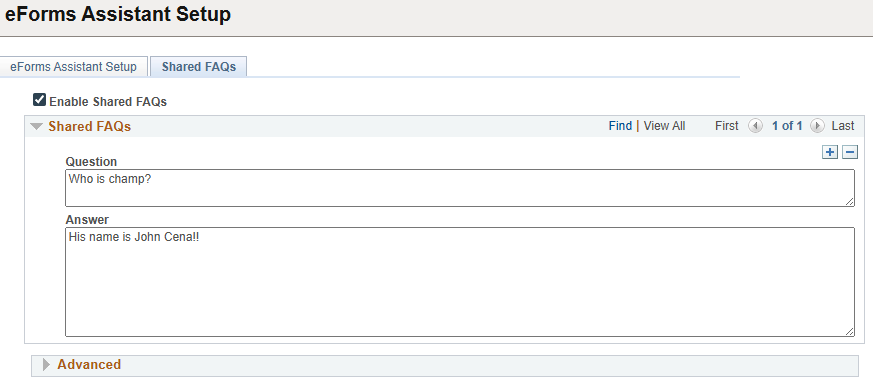
Shared FAQs
Shared FAQs allow questions and answers to be configured that will be accessible anywehere eForms Assistant can be accessed in the environment including any forms that have eForms Assistant enabled. These shared FAQs allow organization level questions not specific to a particular form to be configured in a single location. Once shared FAQs are enabled, the Question/Answer fields will be displayed on the page.
| Field | Value |
|---|---|
| Question | This is where any expected questions that users may have should be entered. The question has a limit of 500 characters in length or 1 - 2 typical paragraphs. |
| Answer | This is where the answer to the question should be entered. The answer has a limit of 2500 characters or 5 - 8 typical paragraphs. |
You may enter as many FAQs as you feel you need.
The Advanced section can be expanded to check to see that the web service used to send your Description and FAQs to the Ida servers is working. If there's an error here, contact GT Support.
More information about the eForms Assistant can be found on these pages:
Enabling eForms Assistant
eForms Assistant Form Type Configuration