Form Admin Tool Security
Form Admin Tool Security allows users to control access to the Form Admin Tool as well as to each of the features within the Admin Tool. Access is permission list based and can be controlled at the Form Type and Form Condition levels.
Navigation: Manage GT eForms 3.x > GT Functional Setup > GT System Setup > Form Admin Tool Security
If no Admin Tool security is configured, then only delivered G3Admin component and page security is applied to the Admin Tool page. Once Admin Tool security is configured for a single permission list, the G3ADMIN component security is overridden, and all needed security will need to be configured.
If the "ALL" Form Type is chosen in a given Admin Tool security definition, then users with that permission list will have Admin Tool access to all Form Types. However, if a security definition contains both "ALL" and other form types, access will default to the more restrictive, specific form type settings.
Users must also have access to the G3ADMIN component and the subsequent pages.
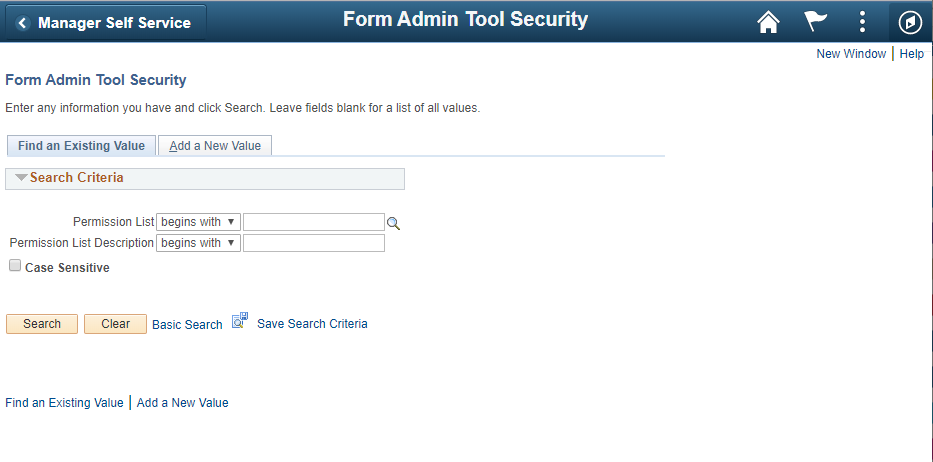
Search Page
Search by Permission List or Permission List Description in the Find an Existing Value tab. Alternately, use the Add a New Value tab to create a new customization.
Find an Existing Value tab
Add a New Value tab

| FIELD | VALUE/USE | |
|---|---|---|
| 1 | Find an Existing Value | Returns name of the permission lists that have already been customized |
| 2 | Add a New Value | Use this tab to customize a permission list that has not previously been customized |
| 3 | Permission List | Prompt field to enter or search for an existing permission list |
| 4 | Permission List Description | Search by the description of the permission list |
| 5 | Case Sensitive (checkbox) | Check to search by exact case match |
| 6 | Search (button) | Runs the search with the parameters indicated |
| 7 | Clear (button) | Clears the search parameters fields |
Form Admin Tool Security
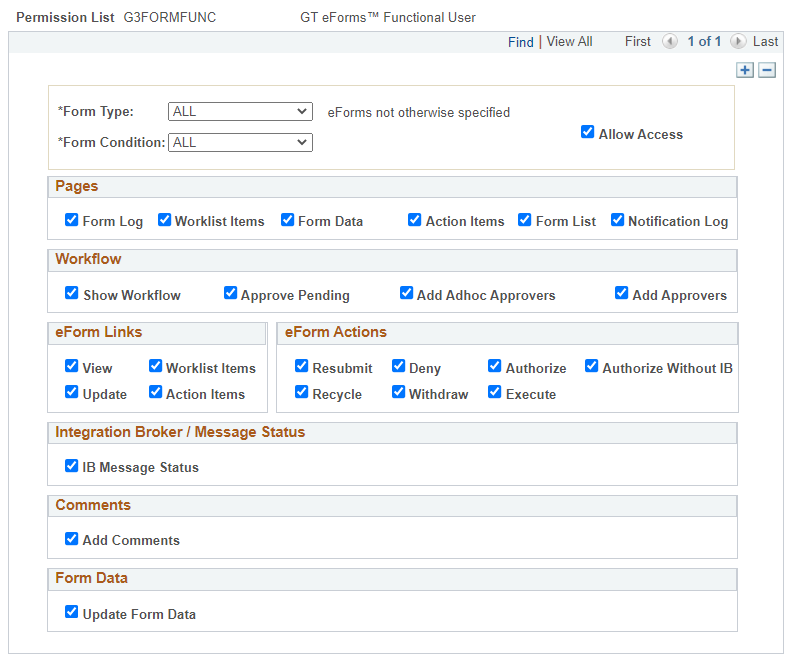
Form Type and Allow Access Checkbox Section
| FIELD | VALUE/USE | |
|---|---|---|
| 1 | Form Type (dropdown) | Shows all form types across the environment. Select “All” to apply the customization across all form types. |
| 2 | Form Condition (dropdown) | Shows the form conditions for the selected form type. A form type must be selected before the form condition dropdown will populate. Select “All” to apply the customization across all form conditions for the selected form type. |
| 3 | Allow Access (checkbox) | If checked, allows access to the Admin Tool for the selected form type. NOTE: User must also have access to the G3ADMIN component and the subsequent pages. |
| 4 | Plus sign (button) | Add another form type for customization. |
| 5 | Minus sign (button) | The minus sign will remove a form type from a permission list. If the last form type is deleted and saved (all rows removed for the given permission list), then the permission list will no longer be customized for the Form Admin Tool. |
Pages Section
Controls which tabs are visible at the top of the Form Admin Tool page.
| FIELD | VALUE/USE | |
|---|---|---|
| 1 | Form Log | Shows the Form Log tab, which contains the transaction and signature log. |
| 2 | Worklist Items | Shows the Worklist Items tab, which displays all users with currently assigned Worklist Items. |
| 3 | Form Data | Shows the Form Data tab, which displays the form’s data in XML (3.50 Standard) or JSON (3.50 Helium) format. |
| 4 | Action Items | Shows the Action Items tab, which displays the date-time stamps of acknowledged action items. |
| 5 | Form List | Shows the Form List tab, which displays Form List Fields and Form Key Data. |
| 6 | Notification Log | Shows the Notification Log, which displays history of notifications sent on the form. |
If action items or worklist items are unchecked, the corresponding boxes in the eForms link section will be checked or unchecked. These boxes should match – the system prevents them from not matching.
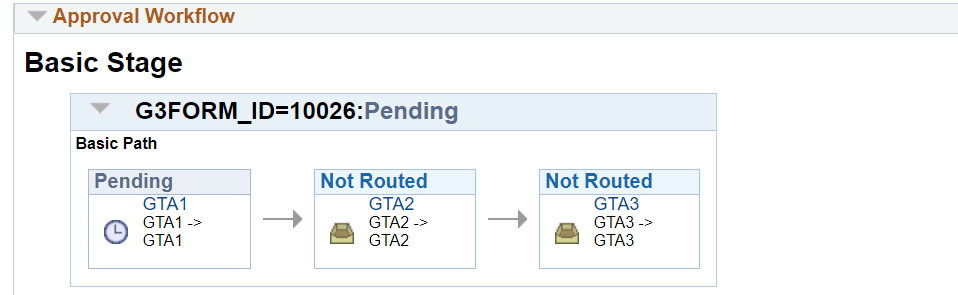
Workflow Section
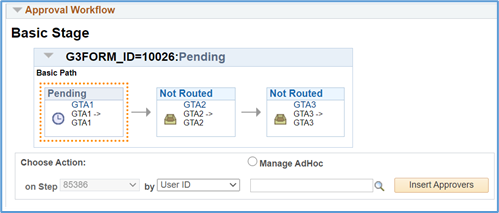
The show workflow button must be checked for the subsequent 3 options to appear within this section. You cannot have the Approve Pending, Add AdHoc Approver, or Add Approvers buttons appear without showing the visualizer.
| FIELD | VALUE/USE | |
|---|---|---|
| 1 | Show Workflow | Displays the AWE workflow visualizer |
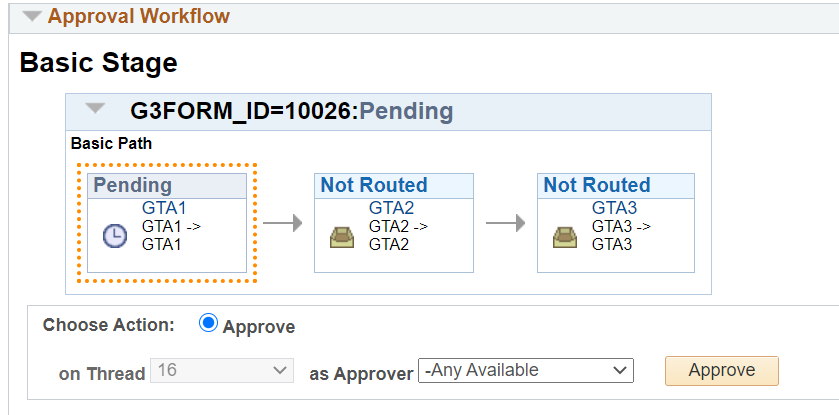
| 2 | Approve Pending | Shows the Approve Pending button |
| 3 | Add AdHoc Approver | Controls the start a new path link, plus buttons between pending/not routed steps, and Save AdHoc approver button. |
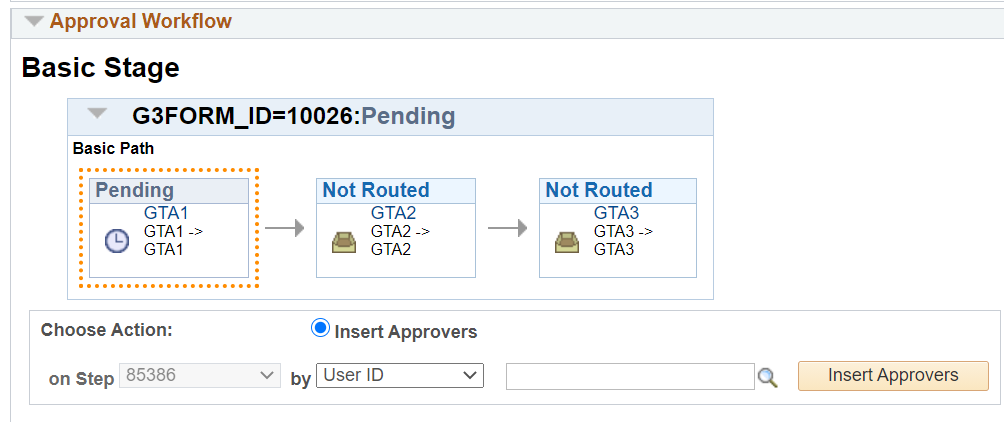
| 4 | Add Approvers | Displays the Set Roster box with the option to click the icon to select a participation roster and the Add as Approvers button. |
Show Workflow button checked
Show Workflow and Approve Pending checked
Show Workflow and Add AdHoc Approver checked
Show Workflow and Add Approver checked
eForms Links Section
This section includes links to form tasks or other tabs within the Admin Tool.
| FIELD | VALUE/USE | |
|---|---|---|
| 1 | View | If checked, a link to the form’s view task will display. The View Task link will open the form in a new window. |
| 2 | Update | If checked, a link to the form’s update task will display. The Update Task link will open the form in a new window. |
| 3 | Worklist Items | Redirects the user to the Worklist Items tab. |
| 4 | Action Items | Redirects the user to the Action Items tab. |
If action items or worklist items are unchecked, the corresponding boxes in the eForms link section will be unchecked. These boxes should match – the system will prevent these from not matching.
eForm Actions Section
This section describes form actions that can be taken within the Admin Tool.
| FIELD | VALUE/USE | |
|---|---|---|
| 1 | Resubmit | If checked, will show the Resubmit link, which allows the form to be resubmitted. |
| 2 | Recycle | If checked, will show the Recycle link, which allows the form to be recycled. |
| 3 | Deny | If checked, will show the Deny link, which allows the form to be denied. |
| 4 | Withdraw | If checked, will show the Withdraw link, which allows the form to be withdrawn. |
| 5 | Authorize | If checked, will show the Authorize link, which allows the form to be authorized. |
| 6 | Authorize Without IB | If checked, will show the Authorize Without IB link, which allows the form to be authorized in the user’s session instead of through the IB. |
| 7 | Execute | If checked, will show the Execute link, which allows the form to be executed. |
Integration Broker/Message Status Section
This section is related to the IB Message Status sections.
| FIELD | VALUE/USE | |
|---|---|---|
| 1 | IB Message Status | If checked, will show the IB log and the status of the form. |
Comments Section
This section will only disable the “Your Comments” section. There is no control on the Comment History box.
| FIELD | VALUE/USE | |
|---|---|---|
| 1 | Add Comments | If checked, will allow the user to add comments in the Your Comments section. |
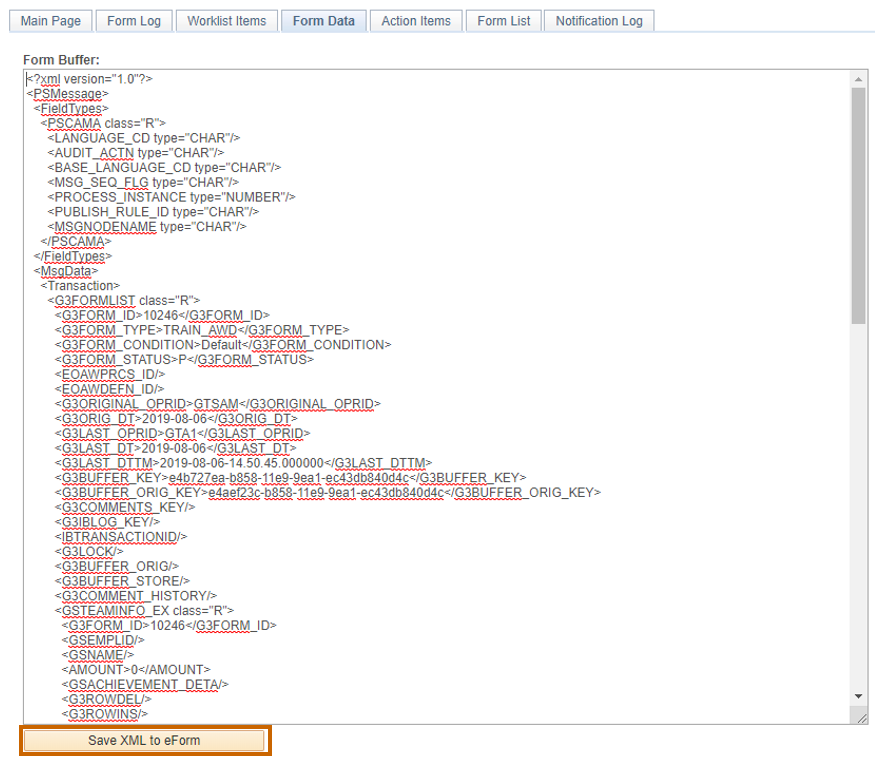
Form Data Section
This section is related to the Form Data tab.
| FIELD | VALUE/USE | |
|---|---|---|
| 1 | Update Form Data | If checked, will allow the user to click the “Save XML to eForm” button and make changes to the form’s data. |
Form Data tab showing the view of a user who has Update Form Data enabled
The features within this customization have the same behavior as the standard Admin Tool within the GT eForms Framework meaning some of the options will not show in the Admin Tool if the action is not warranted on the form.